
09 Apr Vintage Child’s Sun Bonnet Sew-along: Part 1
In an age where we are more conscious of the effects of the sun, it’s great to be able to create a lovely vintage sun bonnet for our young ones. I have used a cotton fabric – the colour and print of the fabric is up to you.
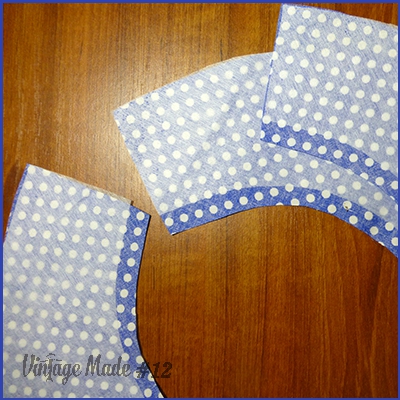
Enlarge the patterns for the bonnet, which you will find on page 40 of Vintage Made issue 12, trace off onto paper (joining the two green pieces at the dotted lines), and cut out the pieces in fabric and, where noted, in iron-on interfacing—on the brim, only take the interfacing up to the stitching line. Place a notch at centre fronts.
In the first part of our sew-along we will cut out and prepare the fabric pieces and apply the bias binding to all appropriate edges.
Following the guides on the pattern pieces regarding how many and from what, cut out your pattern in fabric and interfacing. Apply the interfacing to the brim and band pieces (as per the manufacturer’s instructions for the interfacing you are using).
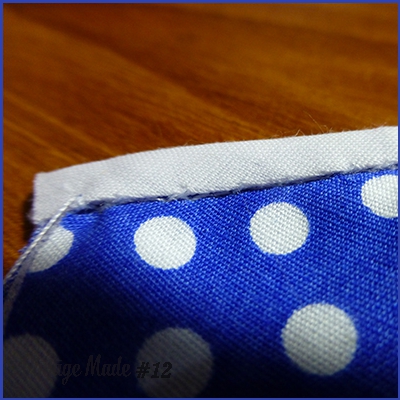
You can see in the first photo that the interfacing only goes up to the stitching line.

In the second, you can see where the interfacing finishes on the band piece.
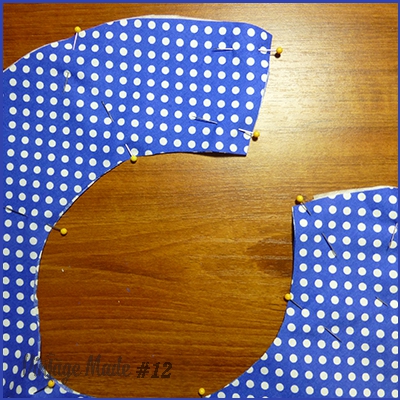
With wrong sides together, pin the brim pieces to each other in preparation for applying the bias binding.

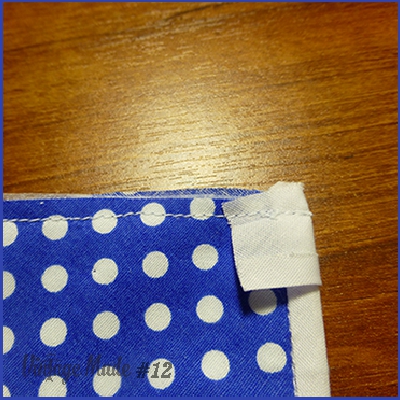
To start, we will apply bias binding to the short edges. Pin a cut piece of bias as shown to the short edge of the brim, matching the edges. Allow extra over both ends.
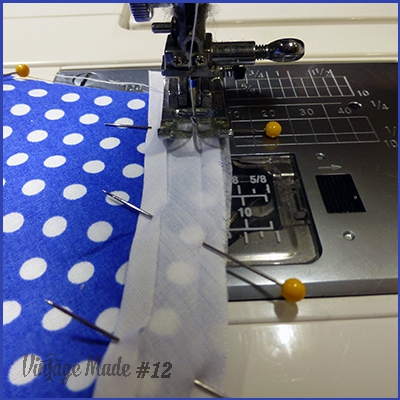
Using your sewing machine, stitch along the crease in the binding, removing pins as you come to them (without running over them….). The side you are working on will be the upper side of the brim.
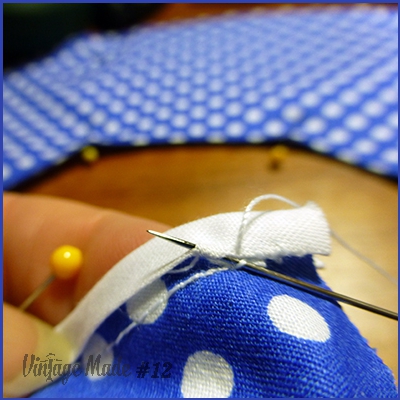
Turn the bias over the edge and hand stitch it to the lower side using a slip stitch.
Repeat for the other short end of the brim.
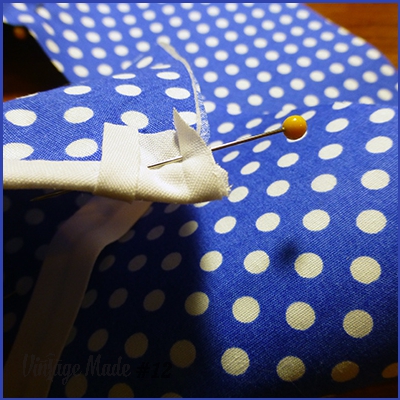
Next we will be applying bias to the curved outer edge of the brim. To make a neat starting point, pin about 1.5cm of the bias to the underneath side of the brim as shown in the photo, and wrap it around the finished bias edge to continue on to the upper side of the brim, pinning to the whole edge and wrapping the bias around the other short edge (when your reach it) in a similar way.
Stitch the pinned bias, removing the pins as you go.
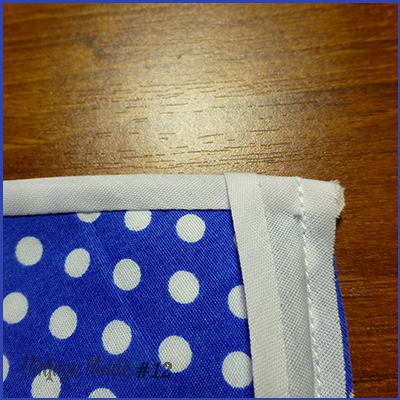
Turn the bias over the edge and hand stitch as before. You may need to trim away a little of the bias at the start and end if it pokes below your stitching.
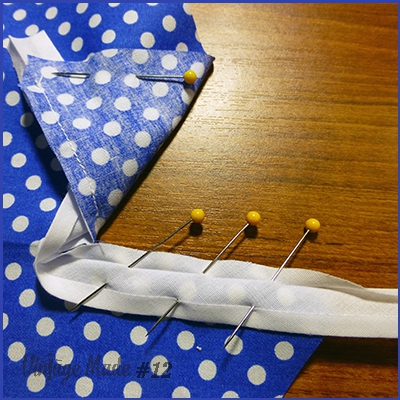
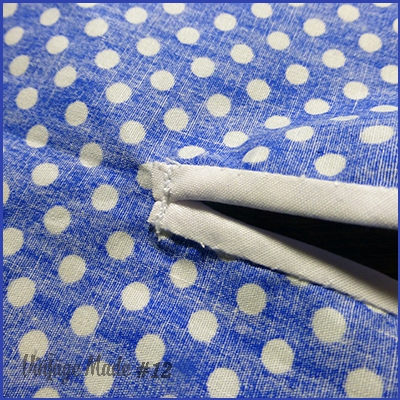
Next we will create and bind the slit at the back of the crown.
Cut the slit at the back of the crown, finishing at the dot and we will apply bias binding to the cut edges.
Cut enough bias to go along both cut sides of the slit and add about 7cm, just in case you need it.
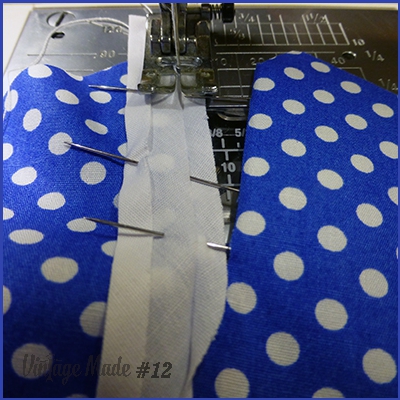
Pin the bias to one side of the slit and stitch that side only.
Do not stitch past the slit.
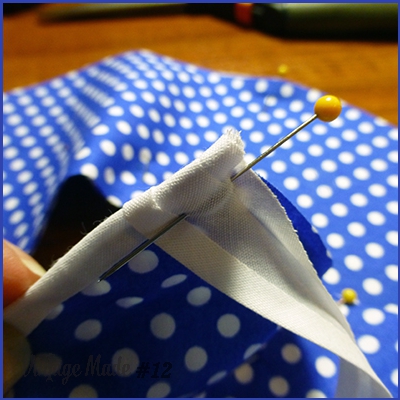
Opening the slit very carefully, and leaving a loop of bias at the point of the slit, pin the bias to the other side of the slit opening.
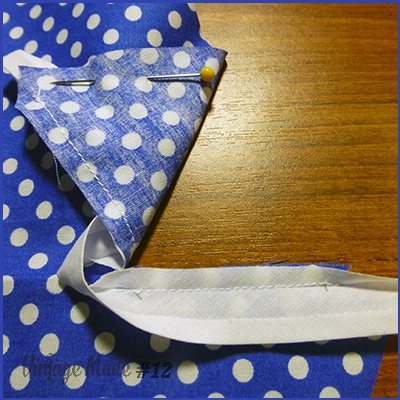
Stitch as per the other side of the slit.
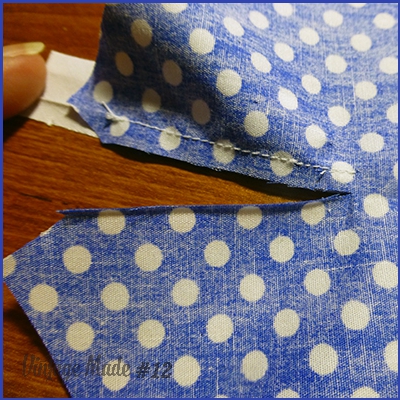
Cut through the loop of bias at the top of the slit.
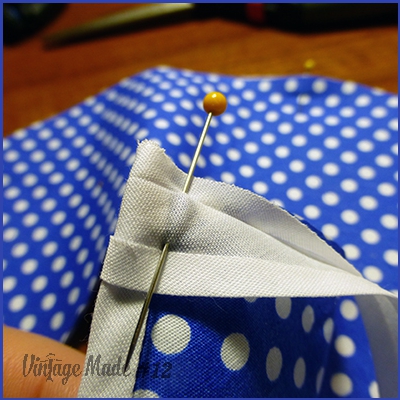
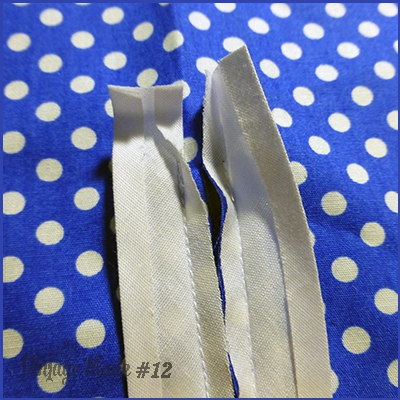
Fold back the end of the bias at the slit point as shown in the photo and proceed as previously to fold the bias to the wrong side of the fabric and hand stitch in place. Do this for both sides of the slit.

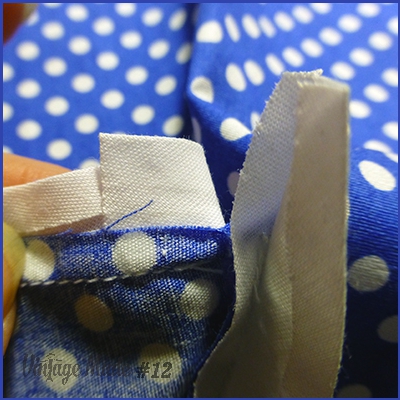
Reinforce the top of the slit with stitching back and forth across the top – we will be hiding this in the next part of the stitch-along.
So, how did you go? If you have any questions, please put them in the comments section.
Part 2 of this sew-along is HERE.
Pattern and instructions by Lynda Worthington
No Comments