13 Apr Vintage Child’s Sun Bonnet Sew-along: Part 2
How did you go with Part 1? Part 1 can be found HERE.
We’re now up to preparing the crown for attaching to the band, and finishing this rather cute sun bonnet.
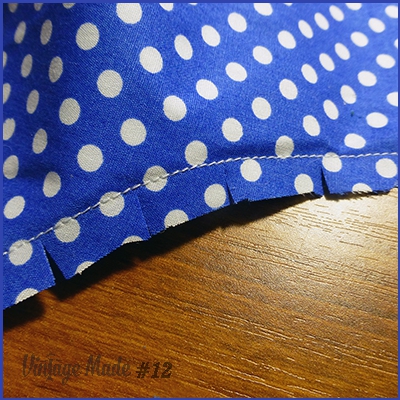
To prepare the crown for attaching to the band we need to gather the crown’s edge to fit the band. To do this, machine two lines of stitching at stitch length 5 close to each other (but not crossing) within the seam, leaving long thread tails at the start and end of the stitching line. Stitch the line closest to the edge of the fabric first.
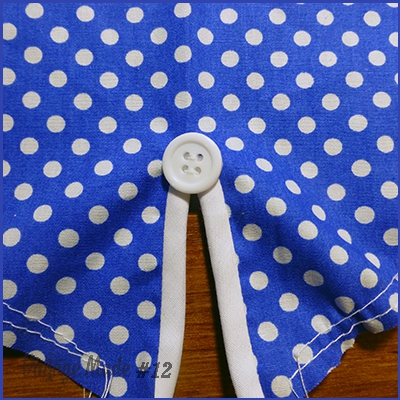
Add a 1.5cm button on top of the reinforcing stitching at the top of the slit to hide the reinforcing stitching.
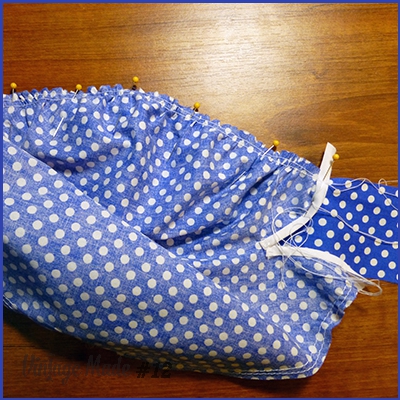
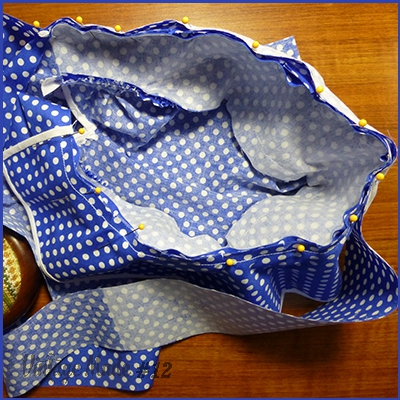
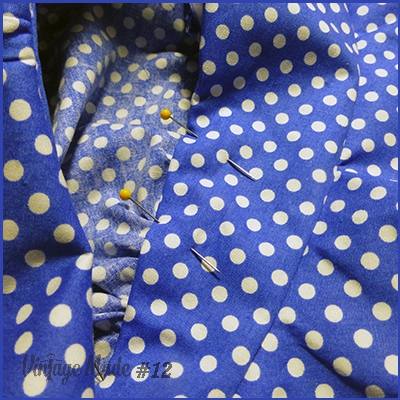
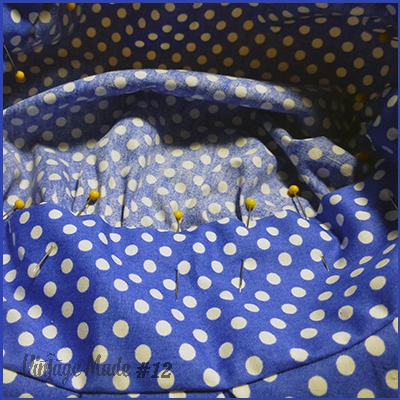
With right sides together, pin the crown to one band piece at the dots and centre front only. Use the two lines of stitching you created around the crown edge to gather up the crown to fit the band piece between the dots, making sure you have matched the centre fronts. To gather, gently ease the crown’s fabric along the stitching lines on one side of the centre front while holding the two tails with your other hand. Once you have gathered the correct amount, wind the thread tails in a figure 8 around the end pin so that the gathered length does not loosen. Ease the gathers so that there are not clumps of gathers and pin the gathered section to the band piece.
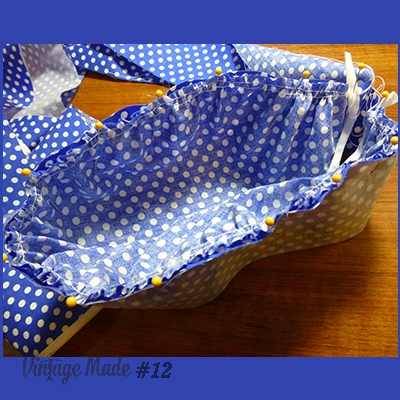
Do the same for the other half of the crown.
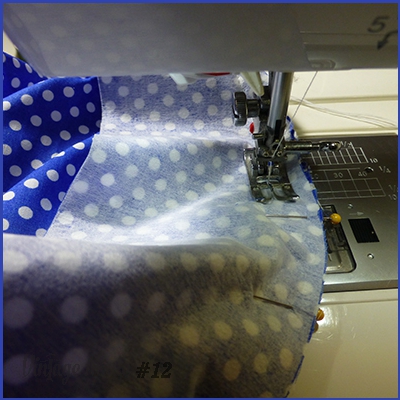
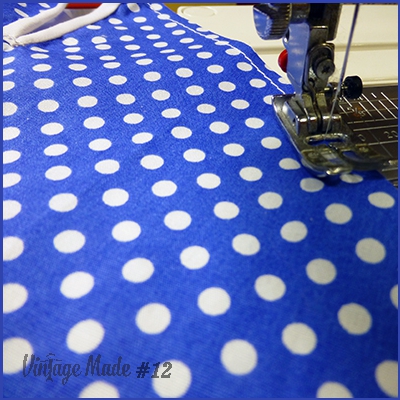
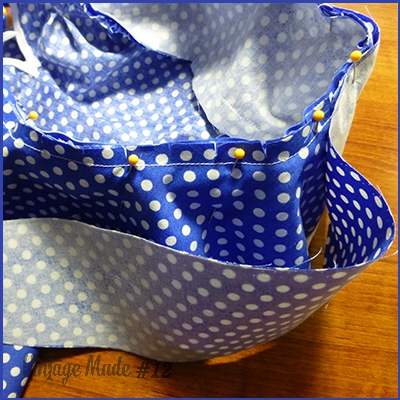
Using your machine and your normal stitch length, stitch the crown to the band piece, carefully removing pins as you go. You will note that I am stitching on the flat side, not on the gathered side. I find this easier as the machine’s foot does not push the gathers along as I stitch – I just have to make sure the gathers are sitting at 90 degrees to my stitching line as I stitch. The secret is to take it slowly, as it is a real pain to have to fix any of it after the event…
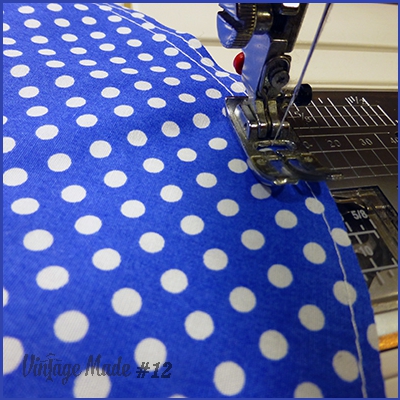
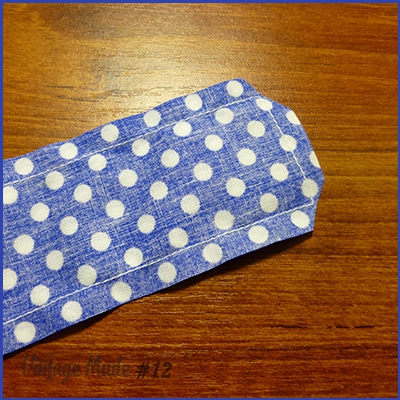
Run a line of stitching 1cm from the inner edge of the brim.
Clip into the seam allowance at regular intervals, close to, but not cutting the stitching.
Pin, right sides together, to the lower edge of the band, matching centre front and the back edges of the brim to the dots.
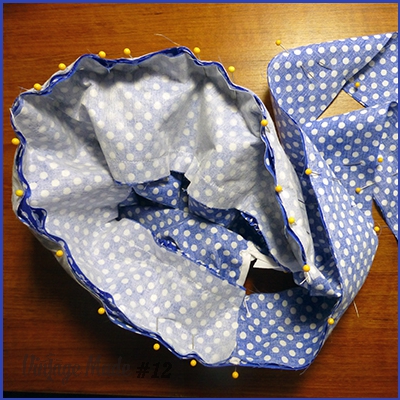
Pin the remaining band piece lower edge to the lower edge of the first band piece, right sides together, matching centre front and dots, sandwiching the brim between the two band pieces.
Pin the band piece extensions (the ties) together as well. Do not pin the second band piece to the first on the upper edge between the dots – leave this open.
Stitch all pinned sections, clipping the corners and trimming some of the excess seam allowance of the ties.

Turn right side out. I used the blunt end of a long artist’s paintbrush to carefully start it off. When you have things right side out, make sure the corners of the tie ends are carefully pushed out as much as possible, without making a hole.
Press with an iron.
Press the remaining band edge seam allowance under and pin in place.

Stitch closed by hand using a slip stitch, and press the bonnet again with an iron if it needs it.
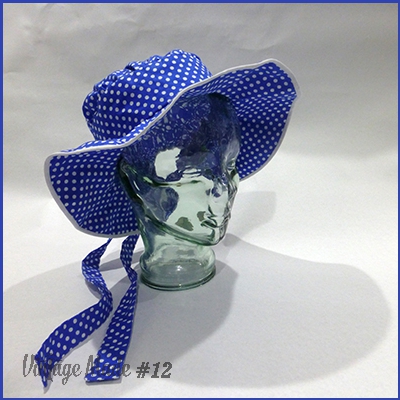
We’ve finished our vintage child’s sun bonnet!
I hope you have enjoyed making yours and would love to see photos ☺
If you do have any questions, please put them in the comments section.
Pattern and instructions by Lynda Worthington
Part 1 of this sew-along is HERE.
No Comments